In WordPress there are several ways to install themes. The easiest way is of course via the backend of WordPress itself.
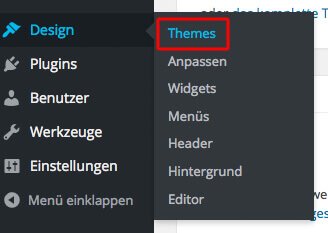
After you have logged in to WordPress, select "Design -> Themes" in the left menu.
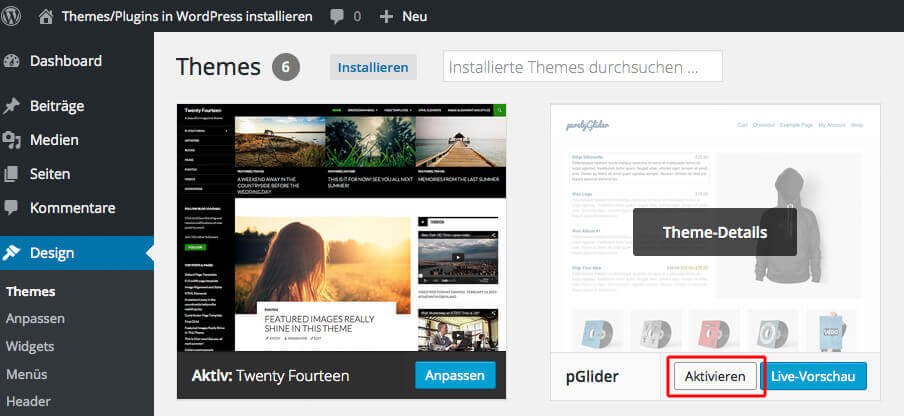
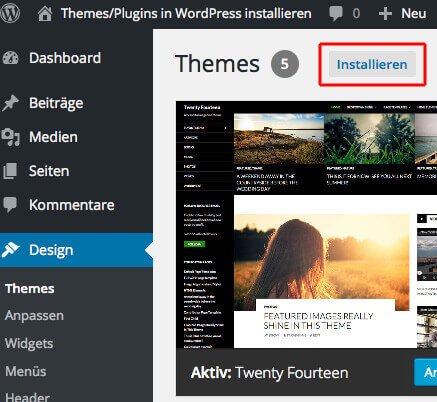
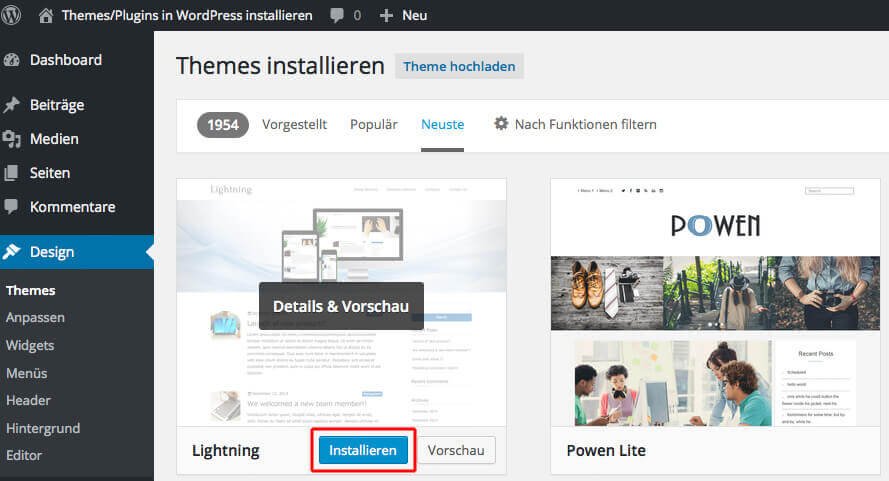
You are now in the overview of the themes already installed in WordPress and can directly activate another theme there. If this selection is not enough for you or you just want to see what other themes are available, click on "Install" in the upper area.
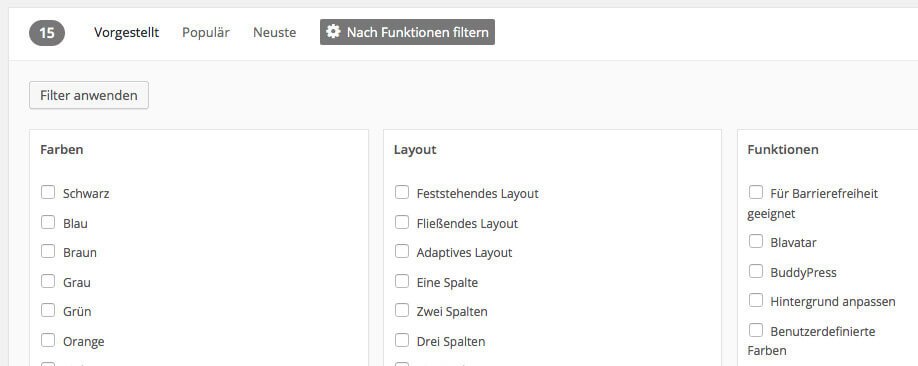
Here you can browse the available themes or filter them if you already have certain ideas about your new theme. The filter function ranges from color and layout presets to selectable functions that the theme should provide.
Once you have found the right theme for your WordPress installation, simply click on "Install" (upper picture). Now the theme is installed and can be activated directly after the installation is finished (picture below).

If the WordPress selection is not enough for you, you will find here a list of links where you can find more free or premium themes for WordPress.
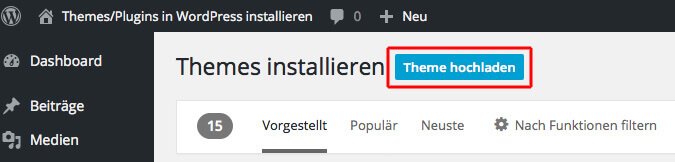
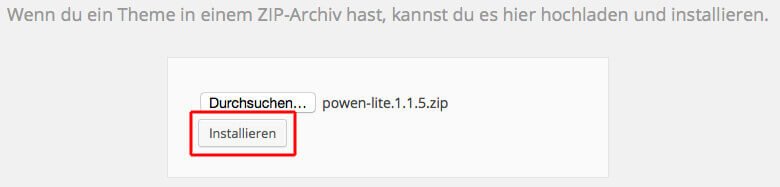
For the installation from a Zip file, which is on your PC, you first have to proceed in the same way as for the normal theme installation. After logging in to WordPress, select "Design -> Themes" >from the left menu and click on Install. Once you have reached the Theme Overview, click on Upload Theme in the upper area.
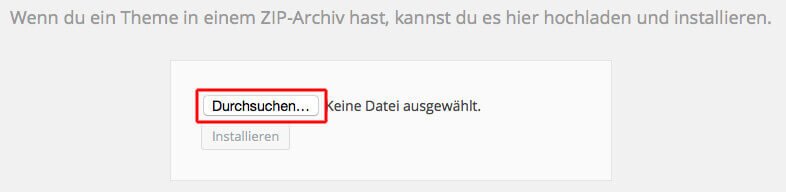
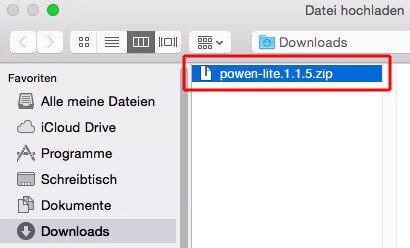
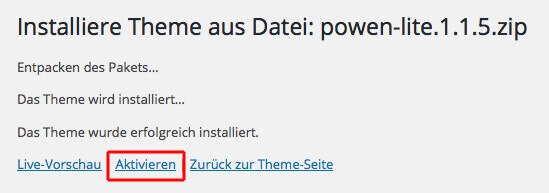
Just search now... (Figure 1) and select the Zip file of the theme on your PC´s hard disk (Figure 2). Then just click on Install (picture 3) and you can activate the theme again directly after the successful installation (Figure 4).
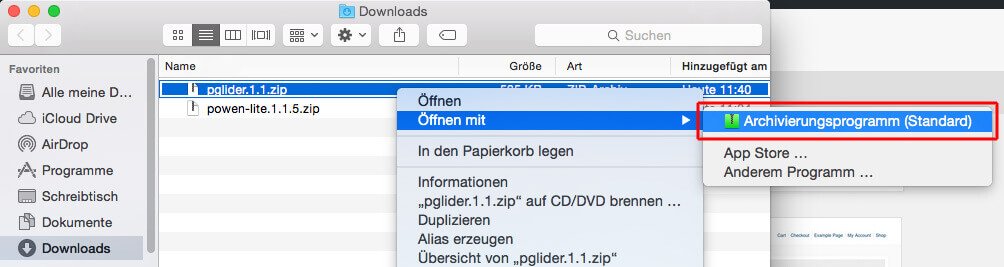
For a manual installation via FTP, the zip file of the theme must first be unpacked on your PC (upper picture). After you have done this, connect to an FTP program (e.g. FileZilla) on your webhosting package (picture below). Load the unzipped theme folder into the directory ../wp-content/themes/ of your WordPress installation.
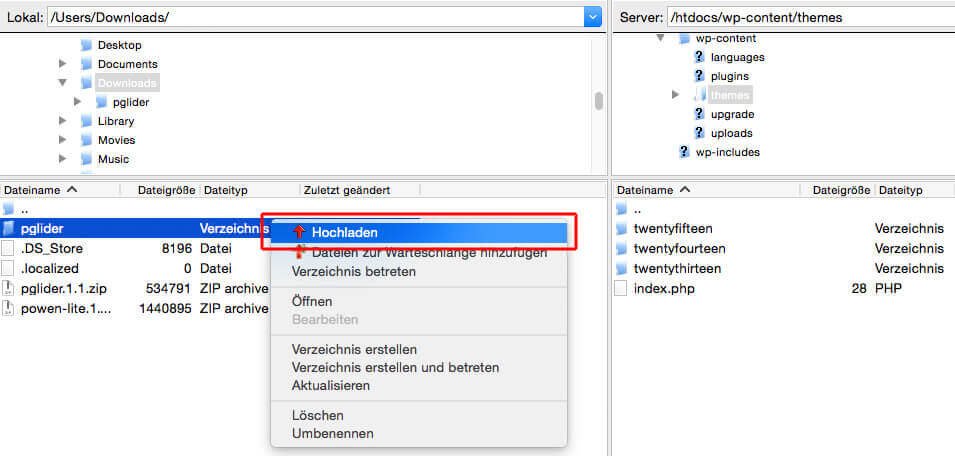
After the upload is finished, log in to the WordPress backend and select "Design -> Themes". There you will find the uploaded theme in the overview and can activate it.