From the series "E-mails that nobody likes to receive": "Your WordPress page has been blocked. Reason: Malicious code has been infiltrated. Please remove it immediately". Unfortunately, checkdomain support also has to send such messages regularly, because hacked WordPress pages are not uncommon. In this article we show you how you can clean up your blog in a few steps and get it up and running again. So, don't panic, take a deep breath and get to the side!
Web hosters like checkdomain regularly check customer servers for malware. If anomalies are detected, the directory or infected application is automatically blocked. Customers are immediately informed by e-mail and asked to take care of the problem.
In addition to a mail from the provider, there are a number of other indications of a hacker attack:
If you notice any of these signs on your WordPress blog, take immediate action to limit the damage.
Hacked pages are often misused as spam or malicious code slingshots. Anyone can become a victim of such an attack, from a small newcomer to a large well-known blog. Hackers usually don't have a specific page in their sights, but aim to spread their malware as widely as possible. To do this, they attack websites where there are security gaps.
If your WordPress page has not already been taken offline by the provider, you must do so as soon as you detect the infection. As the domain owner of the hacked system, you are liable for all possible damages, such as loss of personal data. In case of a case you have to prove that you acted "without culpable hesitation".
In addition, Google quickly removes affected pages from the index so that no other users or pages are affected. You can prevent all this by temporarily blocking your own site from the public.
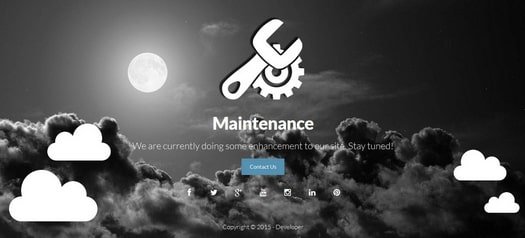
If you still have access to the admin area, installing a maintenance mode plugin is the fastest and easiest solution. For example, download WP Quick Maintenance from the plugin directory of WordPress and activate the maintenance mode - from now on visitors will only see a maintenance hint. Of course you can also create another error page. Basically you should be rather cautious with information about the hacker attack in order not to damage the reputation of your site.
Even if it sounds absurd at first sight, save a backup of the hacked WordPress website including the database. Why? It's very simple, so you can secure evidence if you want to report the hacker attack or file claims for damages. Do not save the file on your computer, but on an external storage medium, isolated from other files.
Next you should check if your computer has been hacked besides your WordPress page. If so, the attacker probably spied out your passwords this way. So that he doesn't get all your changes delivered free of charge, use a virus protection program (which has been updated beforehand) to search for Trojans and remove them if necessary.
The ECO-Verband der Internetwirtschaft offers free programs for this purpose that can be used to remove various types of malware from your computer.
Since you don't know exactly if or which of your passwords have been spied out, you should change all passwords to prevent unauthorized access.
They have to be changed in any case:
We have put together some tips for secure passwords for you here.
This is where the often tedious search for clues begins: you must try to locate the attack. Was it via the WordPress core, i.e. a security hole in WordPress itself? About the theme or a plugin?
The search can be done manually or automatically. The prerequisite for a manual search is a relatively large amount of experience and usually a lot of time. You check files and directories for conspicuous patterns and modification data. Often files like index.php in the root or header.php in the theme folder are changed and malicious code is added.
Much easier are automatic malware scans, which are also possible via plugin. In his blog post on hacked websites, Arne has created a list of tools that help in the search for malicious code. He also gives concrete tips on how to identify malicious code in the script.
And once you've found what you're looking for and removed the malware, it's time to close security gaps - for example, through regular updates and good passwords.
Good to know: Hackers are often only successful because website operators are too comfortable. Even basic security measures such as regular updates of plugins or themes are not carried out. In fact, many premium themes, for example, do not have automatic updates - updates have to be done manually. Sometimes even plugins contained in themes are obsolete and therefore a security risk. Or passwords like "12345" or "Admin" are used.
Security holes occur most often with plugins and themes, while WordPress very rarely has so-called security holes. The WordPress community usually reacts very quickly to these problems. It is crucial that you always keep your applications up to date and that you regularly update and install security patches.
Depending on where the attack occurred, it may be sufficient to simply upload the WordPress core again - without having to restore the content via backup. To reinstall WordPress, upload the folders wp-admin and wp-include, as well as all files in the WordPress root.
Are you unsure whether the new WP installation will suffice? Then play it safe, delete all content in your webspace and upload WordPress including themes, plugins and content. This step is difficult, but may save you a lot of new trouble. Because attackers often leave behind well-camouflaged backdoor scripts that they can use to gain access to your system again later. Complete cleaning protects you from this.

Very helpful in this case is a backup of your blog, which of course should be from the time before the hacker attack. Web hosting packages from checkdomain are backed up automatically and regularly. For security reasons you should also create your own backups of your WordPress page and save them separately. During the backup creation you can be supported by different plugins like UpdraftPlus WordPress Backup Plugin.
If you don't have a secure backup available, you have no choice but to upload all content including databases and images again.
All first aid steps done, no more malware to find and your site is running again? Then you can unlock it. If it has been blocked by your provider: Contact your provider and tell them that the malicious code has been removed. If you have taken your site offline yourself, deactivate the plugin for maintenance mode or remove your own blocking, for example via directory protection. Now you have to apply to Google for a new check so that your page is included in the index again. You can read about the steps you need to take here. Done!
To make it difficult for hackers on your WordPress page in the future, here are a few short security tips:
With our first aid instructions you should be able to remove the hacker attack quickly. Nevertheless, be thorough in your malware search and keep your WordPress always up to date.