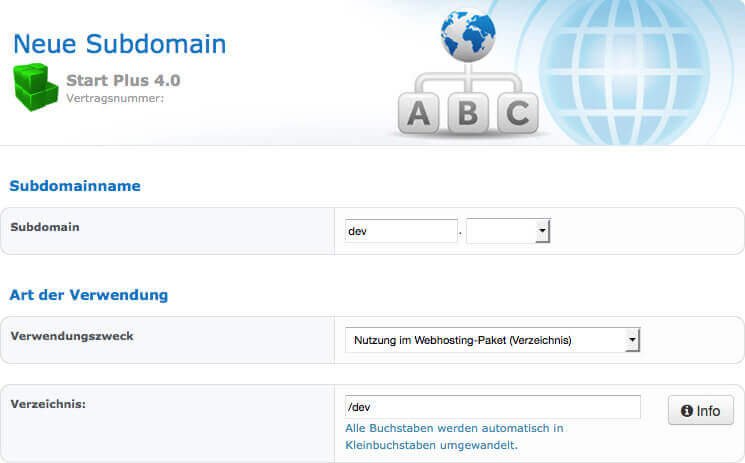
First, create a new subdomain on your hosting package that points to a separate root directory. In my example the subdomain "dev.deinedomain.de" refers to the root directory "/dev". Tip for checkdomain customers: You can create a new subdomain in the customer area under "Login -> Hosting -> Subdomain administration".
Now copy all files from WordPress into the root directory of the subdomain. It is best to download them from the hosting and then upload them back to the main directory of the subdomain (in the example /dev). This way you don't run the risk of moving the data of your live page instead of copying it
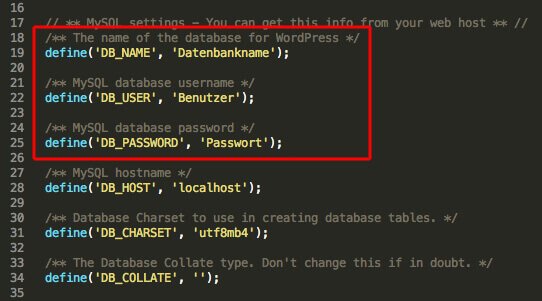
The next step is to create a new database and download the wp-config.php of the subdomain to your PC. There you open the file in an editor such as Notepad++ (Windows) or SublimeText2 (Mac) and enter the database name, user and password of the newly created database.
Save the wp-config.php and leave it on your PC for now. We will edit it later.
Now install the plugin WP Migrate DB in your original WordPress page. This plugin simplifies the creation of the test environment as you can directly replace values in the database for your test environment when exporting the database. So you don't have to do this tediously with MySQL commands or with search/replace.
For the next steps you need your absolute server path. Ask your host if you don't know it.
Tip for checkdomain customers: You can find the absolute server path in your customer area under "Login -> Webhosting -> Server info -> Server path". At the end of the path you simply append the respective main directory to e.g. /home/abcdefg/dev
Since we have already prepared the database perfectly for the test environment with the WP Migrate DB Plugin, it only needs to be imported into the new, empty database of the subdomain. You can do this via phpMyAdmin.
Tip for checkdomain customers: You can find a link to phpMyAdmin in your customer area under "Login -> Webhosting -> Serverinfos -> MySQL-Databases". Log in to phpMyAdmin and select the database in the left column. Click on "Import" in the upper menu bar.

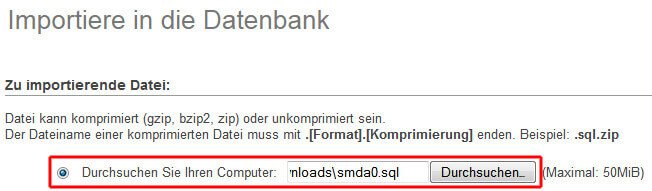
Next click on "Browse..." to select the SQL file of the database on your PC.
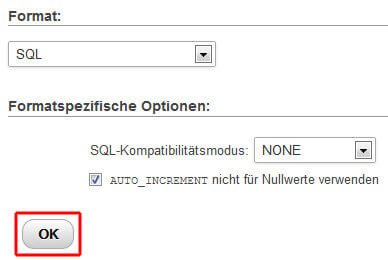
In the lower part you leave the settings at the default values and just click on "Ok". The SQL file will now be imported and you have done this step.
If you want your test environment not to be publicly accessible, you should activate directory protection for the root directory of your subdomain. You can do a directory protection either via htaccess file or via the customer area of your host.
If you want your test environment not to be publicly accessible, you should activate directory protection for the root directory of your subdomain. You can do a directory protection either via htaccess file or via the customer area of your host.
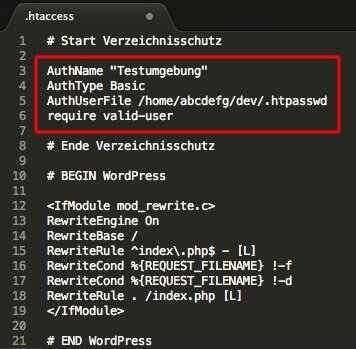
To set up a directory protection via htaccess, you have to edit the .htaccess file of WordPress and create a .htpasswd file with a text editor and upload both files into the main directory of the subdomain. If necessary, you can only save the files as .txt files and then simply have to rename them after uploading them to your hosting in the FTP program. In the picture below you can see the content of the required htaccess file.
The easiest way to create the .htpasswd file is to use an htpasswd generator. Copy the generated line into an empty text file and save it as .htpasswd.
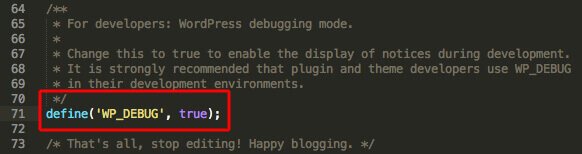
Now we make one last change to wp-config.php to enable the debug mode of WordPress. Search in wp-config.php for WP_DEBUG and change the value from false to true as in the picture below.
After you have saved the changed file, upload it back to the root directory of the subdomain and overwrite the existing file. Thus you have linked the WordPress test page with the new database and activated the debug mode for WordPress.
Now you can start testing directly. Always make sure to use the same versions in the test environment as on your live page for WordPress, the themes and plugins, so that you get usable results when testing.
We are pleased if we could arouse your interest in WordPress. The following list contains some links to get started with your WordPress page: