To have more design possibilities, but above all: to be independent. This desire for more freedom is sooner or later felt by many bloggers who started their careers with platforms like Blogger. In the beginning, these services are a good solution because they cost nothing and make hardly any demands on the technical knowledge of the users. In the long run, however, the possibilities here are quite limited. The logical step is to host the blog yourself and switch from blogger.com to wordpress.org, for example.
In this article we show you how the blog migration from Blogger to your own WordPress blog works in just a few steps. If you want to move your free blog from WordPress.com to your own domain, you'll find step-by-step instructions here.
Like any move, a blog move is a thing where you have to weigh the pros and cons carefully. The whole thing is much simpler than most users fear - but time and effort still have to be invested.
These points speak for a self-hosted blog:
In the video we have explained the first four of the following steps in fast motion. The detailed instructions can be found below.
These points speak for a self-hosted blog:
An own domain plus storage space in the net are basic requirements for an own blog. If you book these services as part of a web hosting package, make sure that it also includes the required services: In addition to the domain, these are for a WordPress blog currently a MySQL 5.0 database or higher and PHP 5.2.4 or higher. In addition, there is a sufficiently large web space, especially if you work with a lot of pictures, and if possible a traffic flat to avoid additional costs.
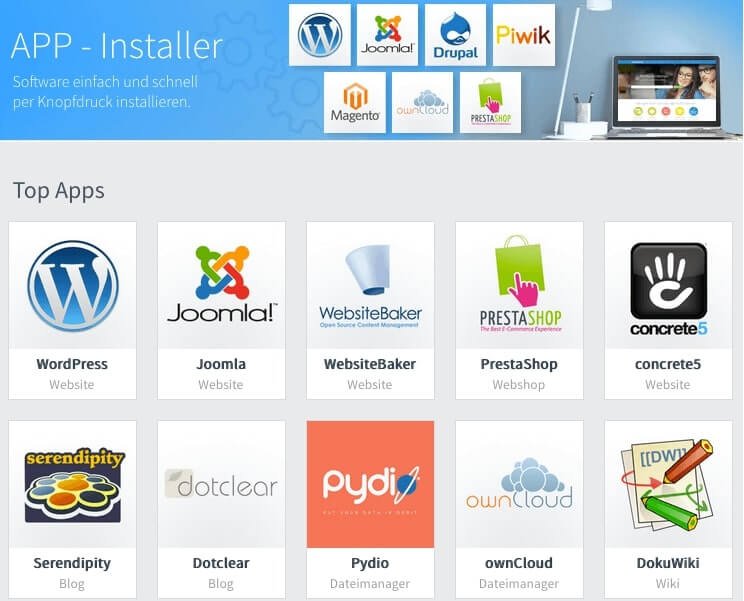
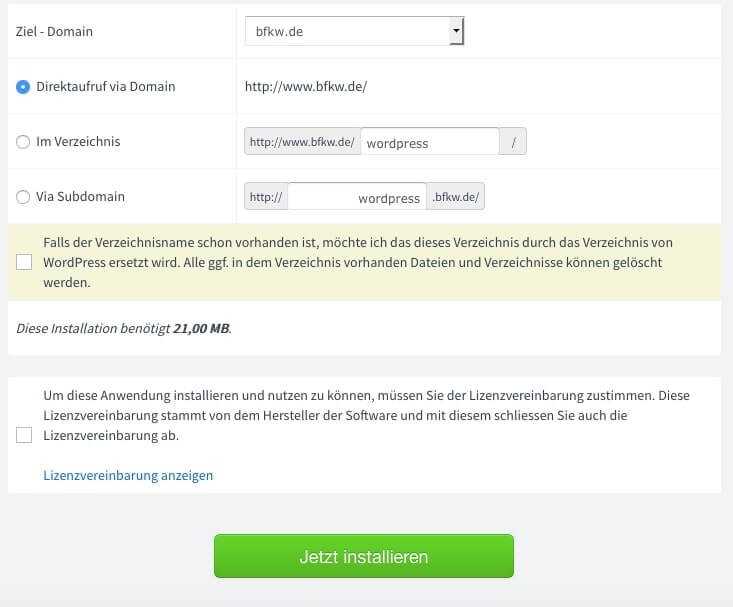
Once you've secured your domain and ordered the web hosting package, the move can begin. Now you have to install WordPress. To do this you either go to WordPress.org or as a checkdomain customer choose the much easier way via our software installer:
Your new WordPress blog of course comes with a standard theme (a small collection of standard themes to be precise). But if you're doing the work of hosting a blog yourself, you don't usually want to rely on the simplest ready-made solution. You'll find a large selection of paid WordPress themes on the net from a variety of providers - we'll also give you an overview in the checkdomain blog. What you ultimately decide on depends entirely on your own taste and requirements. In any case, it is important that the theme is responsive, i.e. also optimized for display on mobile devices.
It is recommended to make the most important settings for the selected theme and to save the fine-tuning until all content has been moved from blogger to WordPress.
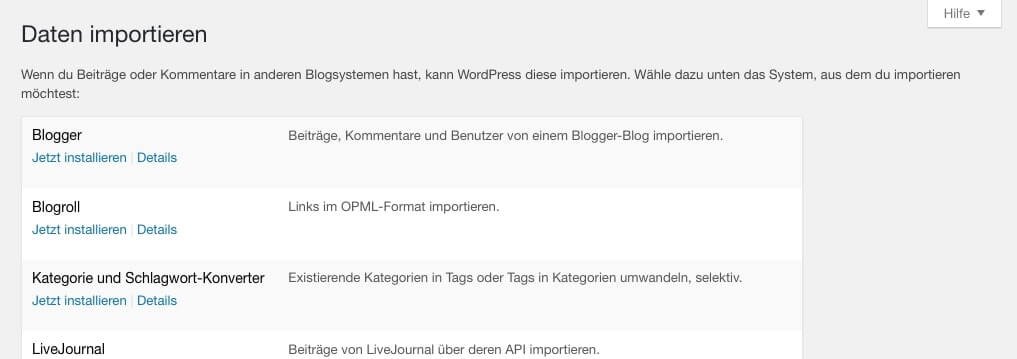
This step was a big challenge for a long time, but is now only half as bad. The Blogger Importer Plugin is a really hard-working removal tool that transports everything from A to B quickly and reliably.
You don't even have to download this plugin separately. Just go to the left sidebar of your new WordPress blog and click on "Tools" and "Import data". The first thing you see here is "Blogger". Install the plugin, then click on "Activate Plugin & Run Importer" and finally on Authorize and Allow access - the move starts automatically.
Depending on the size of your blog or the amount of data to be imported, the move will take a few minutes or even several hours. You may have to go to "Update import" if the system gets down on its knees because the amount of data is too large
It's best not to post any new posts during the relocation phase or edit any posts on your old blog, as these often cause problems for the relocation plugin. Posts will either not be imported or will be imported twice (unfortunately this also applies to comments). This means that you would have to import manually or delete duplicate content.
And another problem that some bloggers stumble across: It happens that pictures are not imported in their original size. Here, too, only manual changes can help.
We are already on the home straight, but still have a few tasks ahead of us. For those who already had their own domain at Blogger, this includes customizing the links posted from other sites to your old blog. They should continue to work:
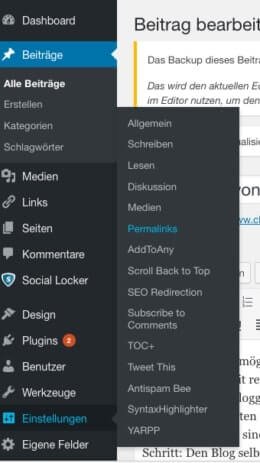
In WordPress, go to Settings in the sidebar and click on Permalinks, then on Post Name and on Apply Changes. Then the links should also work with WordPress - if you want to be on the safe side, check them out.
Next item on the list: Delete the Google Analytics code from Blogger and paste it into WordPress. The same applies to the RSS feed if you use this option. In addition, it is recommended to install various plugins (e.g. spam protection, hacker protection, SEO, editorial plan...). And then, of course, you can make adjustments to the design.
Everything works, everything looks the way you want it to? Then your users can come!
To avoid losing visitors, you should not simply delete the old blog even after your move has been completed, but instead set a redirect - also called redirect. This means that every user who accesses the usual blogspot address will be sent directly to your new blog at home. Pagerank and Co. will also be retained.
This means that every user who accesses the usual blogspot address will be sent directly to your new blog home. Pagerank and Co. will also be retained.
The redirection is also easy and comfortable via a plugin: So quickly into the sidebar, on plugins and install. Search here for the plugin Blogger 301 Redirect, install and activate it. Click Settings. In the menu that opens, select Blogger 301 Redirect. Scroll down a bit, copy the code and paste it into your old Blogger blog: Go to Dashboard, Template and Edit HTML Templates - now the redirect is done and the move is perfect!
If you haven't had the courage to move your blog yet, we hope our guide will motivate you to take this worthwhile step. And if you have any questions or suggestions: We are looking forward to your feedback!
With our ranking coach you are able to perform SEO for WordPress easily and quickly.
We are pleased if we could arouse your interest in WordPress. The following list contains some links to get started with your WordPress page: