You dream of owning your own place? Then quickly make everything clear for the big opening celebration - because at least online a shop can now be created within a very short time. On the net you will find a large selection of software, many of which are free of charge and easy to use even for beginners. This includes, for example, CMS-supported solutions with which online shops can be set up via WordPress. In this article we will show you how to connect your WordPress with the plugin WooCommerce and how to get your own shop in a very simple way.
WordPress is of course primarily a content management system (CMS), not an e-commerce platform. Accordingly, it is not possible to start online shops in very large dimensions or with a multitude of technical refinements in this way. But in a comparatively simple and inexpensive way you get functional online shops with all the necessary professional features - no matter whether you want to offer your future customers physical products or content for download.
An online shop via WordPress has the special charm that you can install and edit the shop completely uncomplicated via the familiar WordPress dashboard and, if necessary, expand it using plugins - just as you are used to from blogging. So you get a "company headquarters" from which you can manage your assortment, accept customer orders, keep an eye on shipping taxes and marketing.
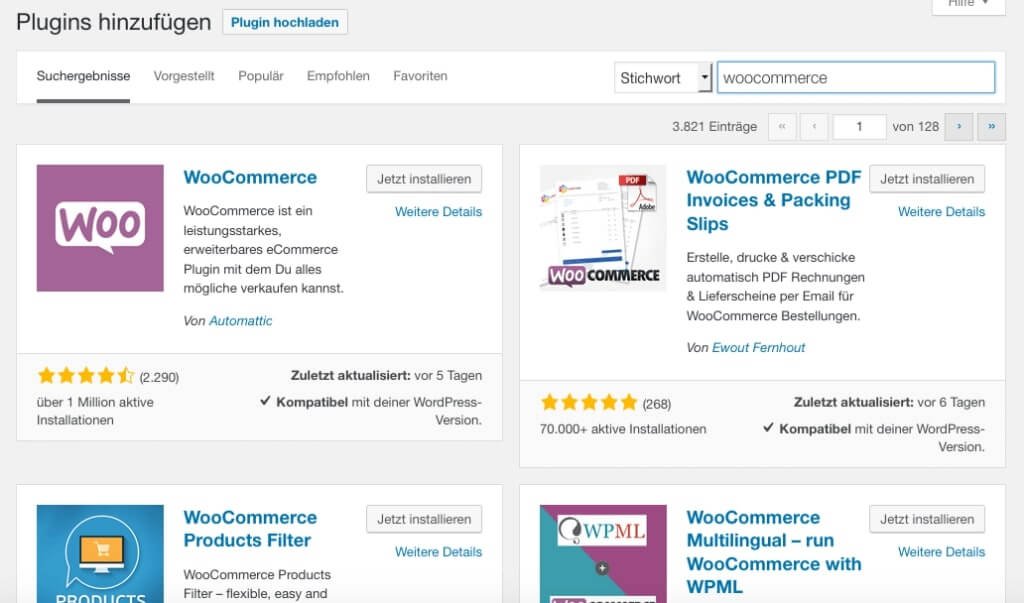
Nearly 23 million downloads and, according to the company, a share of 28 percent among online shop systems: This puts WooCommerce quite far ahead. The big plus is the connection to WordPress. This saves users a complex installation. In addition, there are the comprehensive functions already available in the free version, which can be expanded at any time with features that are subject to a charge.
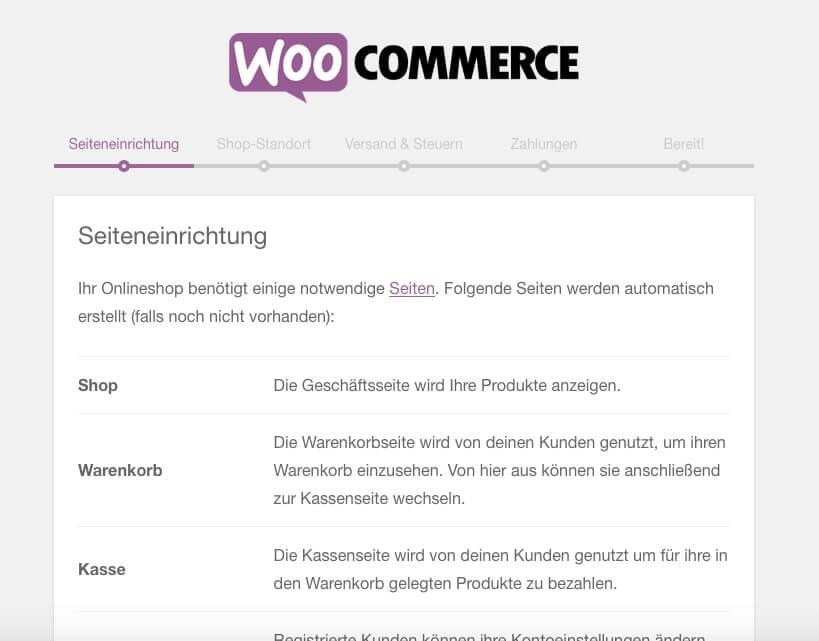
That's good to know: All information that you enter during the setup process (such as location, shipping costs or payment options), you can change afterwards - so it is no problem at all if you do something wrong at this point or do not yet know exactly.
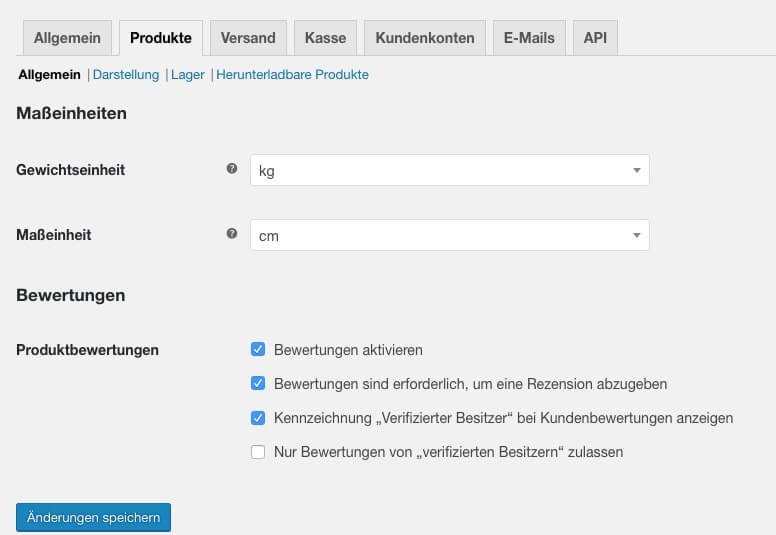
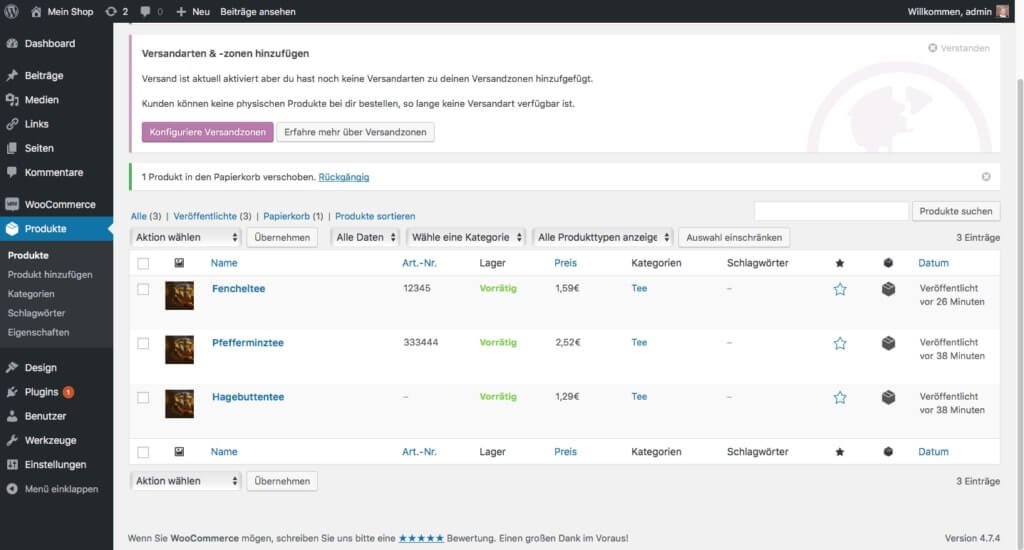
If you are an old WordPress rabbit, you can set up your new WooCommerce shop almost in your sleep, because the processes are very similar. For the basic settings, go to "Settings" in the left sidebar under WooCommerce. Here you can manage the most important elements directly, simply by clicking from tab to tab:
Where is there something in your new shop? You determine that with the navigation. If you have used the WooCommerce setup wizard, you start with a main navigation that has four menu items: Shop, Shopping Cart, Checkout and My Account.
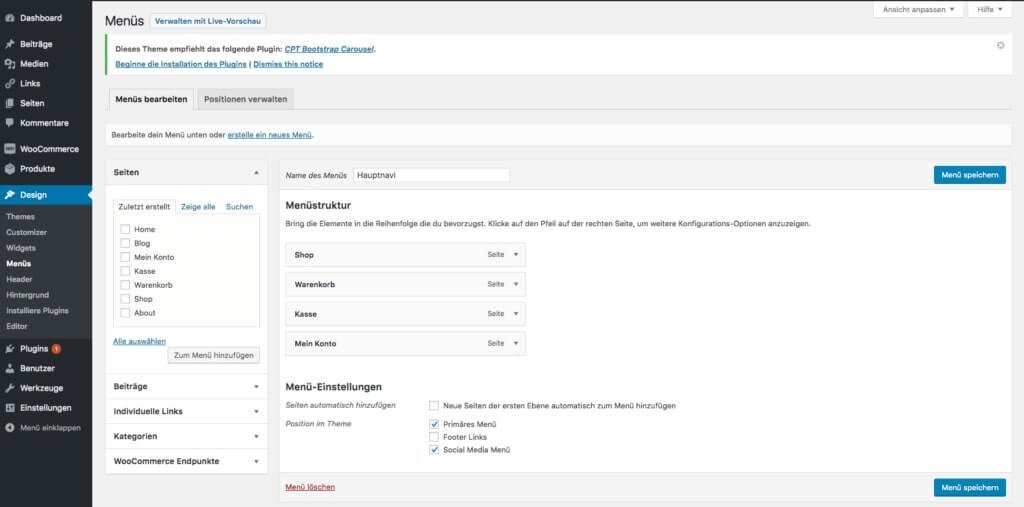
If you want to create further pages or adjust the navigation menu, this works as usual via the sidebar. Go to the tab "Design" and click on "Menu". In the sub-area "Edit menus" you create a new menu and then add the desired pages to your menu from the window "Menu structure". Finally, be sure to go to "Save menu" to save your settings.
Depending on your WordPress theme you can also change the design of your shop. How you design the look depends on many different factors:
Tip: Not every blog theme supports a shop function. You may have to replace your previous template. Or vice versa: When searching for a new template, make sure that it can also be used in conjunction with a shop. In the net you will find numerous free and chargeable templates.
You can certainly improve some of the details in your shop. But we will skip that at this point and come straight to the essentials of every shop: the goods. It still has to be on the shelves so that customers can buy it. Say: You have to upload content. And also this works with WooCommerce again analogously to the publishing of blog contributions.
To do this, please go to "Products" and "Add products" in the sidebar. Enter the name of the product, write a good product description and upload matching images. Finally, you should check the right boxes in the product data.
Ready? Not quite yet. Before the first customers can come, you have to classify your products in category pages. Go to "Products" in the menu, then to "Categories" and enter the name and URL version of your category. Additionally you should add a product description and a thumbnail. To save the information, click on "Add product category".
Now please go back to editing your product and tick the appropriate "Product Category" on the right side. Then all you have to do is click on "Publish" or "Update" and your first product will be online.
Tip: Before you officially open your shop, you should first do a test run yourself and go shopping in your own shop - so you can see whether everything works or whether it still hangs in one or the other place.
As our instructions show: Creating an online shop via WordPress is quick and easy. The result is quite appealing, but does not come close to classic shop systems like Magento. This variant is therefore particularly suitable for beginners who want to gain their first experience in online shopping.
Finally, all advantages and disadvantages at a glance: